Setup a blog using Jekyll
Today i’m going to show you how ive setup this blog. I decided to go with the default theme Minima that you get when creating a new Jekyll site and customize it to my needs.
Quickstart
taken from following url: https://jekyllrb.com/docs/
-
Install Ruby for your distribution
-
Install Jekyll and bundler gems
gem install jekyll bundler -
Create a new Jekyll site at ./myblog
jekyll new myblog -
Change into your new directory
cd myblog -
Build the site and make it available on a local server
bundle exec jekyll serve -
Now browse to http://localhost:4000
Great.. We’re now up and running and can dive into the customizations i wanted this blog to have.
Sorted navigation
To control the order or the navigation links of the default theme you simply just have to include a header_pages section into your _config.xml. Like doumented on the github page of the theme.
So on my blog the section looks like this:
header_pages:
  - categories.md
  - tags.md
  - privacy.md
  - imprint.md
Excerpts on the Home Page
To show some excerpt of the posts on the overview page we simply just follow the documentation of the minima theme again and add a show_excerpts attribute to our _config.yml.
show_excerpts: true
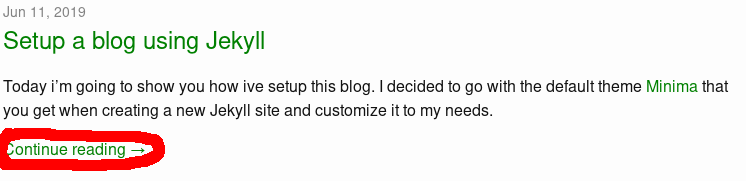
Now to the tricky part. Since I wanted to have some kinda indicator on the overview page that makes sure that this is just an excerpt and you have to click on the post to read the full article i had modify the theme a little bit.
But nothing easier then that. Lets go.
If we look into the sourcecode of the theme we’re going to find the affected component in the _layouts folder called home.html.
So we simply just create a _layouts folder in our blog aswell. Copy over the affected layout home.html from the default theme and modify the post.excerpt part in the source like so:
{%- if site.show_excerpts -%}
    {{ post.excerpt }}
    <a class="excerpt-post-link" href="{{ post.url | relative_url }}">Continue reading →</a>
{%- endif -%}
We have now successfully overwritten the home.html of the default theme and should have a nice looking overview page with excerpts and an indicator.
Lets get trickier..
Adding Liquid Tags and Categories to your page
There are different ways to add categories and tags to your layout.
For a simple overview page you can follow along the tutorial on the jekyll site and create a markdown file that will list all those tags and categories on one page but that wasnt realy what i wanted. I wanted those overview pages to be sorted, maybe searchable in a future version and have a bit more structure to all of this.
And there is a way to archive that by using generators that jekyll provides which allow you to get a little bit deeper into the materia.
You can read up more about generators following this link Jekyll Generators.
Unfortunately i dont find the source of evil where i copied most of the code from right now. If you know it feel free to send me an email and i’ll update this page.
Nevertheless lets dive into the funky world of Jekyll generators now.
Generators are placed into a folder called _plugins which are ruby files that get executed pretty early in the build process and wont be picked up by any of the watch and reload methods the build and serve methods provide. So keep in mind to manualy restart a build when working with plugins.
Now to the code.
We create a folder called ‘_plugins’ like stated before and create a file called _cat_gen.rb in that folder.
_cat_gen.rb
module Jekyll
    class CatIndex < Page
      def initialize(site, base, dir, cat)
        @site = site
        @base = base
        @dir = dir
        @name = 'index.html'
        self.process(@name)
        self.read_yaml(File.join(base, '_layouts'), 'cat_index.html')
        self.data['cat'] = cat
     end
    end
    class CatGenerator < Generator
      safe true
      def generate(site)
        if site.layouts.key? 'cat_index'
          dir = 'categories'
          site.categories.keys.each do |cat|
            write_cat_index(site, File.join(dir, cat), cat)
          end
        end
      end
      def write_cat_index(site, dir, cat)
        index = CatIndex.new(site, site.source, dir, cat)
        index.render(site.layouts, site.site_payload)
        index.write(site.dest)
        site.pages << index
      end
    end
  end
If you read carefully you’ll see that we need to provide a layout file called cat_index into which our categories will get generated.
So lets go and create this file in the _layouts folder.
cat_index.html
<div class="category">
<!-- <a class="tag__back" href="/"><-- back</a> -->
<h1 class="post-list-heading">{{ page.cat }}</h1>
<div>
{% if site.categories[page.cat] %}
<ul class="post-list">
{% for post in site.categories[page.cat] %}
<li>
{%- assign date_format = site.minima.date_format | default: "%b %-d, %Y"
-%}
<span class="post-meta">{{ post.date | date: date_format }}</span>
<h3>
<a class="post-link" href="{{ post.url | relative_url }}">
{{ post.title | escape }}
</a>
</h3>
{%- if site.show_excerpts -%}
{{ post.excerpt }}
<a class="excerpt-post-link" href="{{ post.url | relative_url }}">
Continue reading →
</a>
{%- endif -%}
</li>
{% endfor %}
</ul>
{% else %}
<p>There is no posts for this category.</p>
{% endif %}
</div>
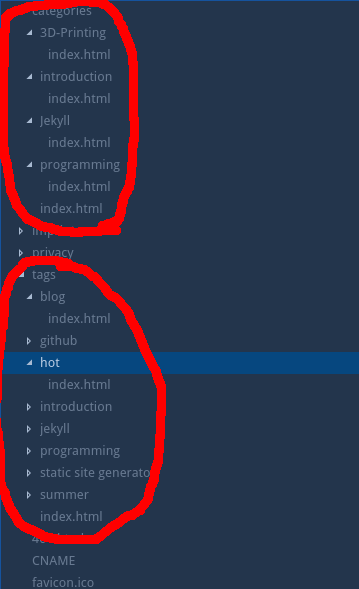
</div>If we now manually retrigger a build process we should have a structured folder called categories with all sub-categories and their belonging index.html files.
Besides of that i wanted to have a Category and Tags link in the Navigation bar aswell which links to this folder.
For this we simply just create a file called categories.md in the root of our project with the following source.
---
layout: page
title: Categories
permalink: /categories/
---
{% assign categories = site.categories | sort %}
{% for category in categories %}
<li class="post-list" style="font-size: {{ category | last | size | times: 400 | divided_by: categories.size }}%">
<a href="/categories/{{ category | first | slugize }}/">
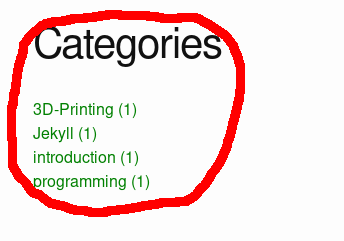
{{ category | first }} ({{ category | last | size }})
</a>
</li>
{% endfor %}To get the tags working you can simply reuse all of the above and make sure that you exchange the site.categories variable with site.tags or simply copy and paste the code from my github source of truth.
If done right there should be a category_overview page now looking something like this:
Now the only thing missing is that we show those categories and tags under each post aswell so the user can click on them and browse along.
So lets go..
We copy the post.html from the minima source into our _layouts folder.
and we paste folling code to the end of that page
  <a class="u-url" href="{{ page.url | relative_url }}" hidden></a>

  {% if page.categories %}
  <span> Posted in: </span>
  {% for category in page.categories %}
  <span>
    <a href="/categories/{{ category }}">{{ category }}</a
    >{% if forloop.last==false %}, {% endif %}
  </span>
  {% endfor %} {% endif %}

  <br />

  {% if page.tags %}
  <span> Tagged: </span>
  {% for tag in page.tags %}
  <span>
    <a href="/tags/{{ tag }}">{{ tag }}</a
    >{% if forloop.last==false %}, {% endif %}
  </span>
  {% endfor %} {% endif %}
</article>
I hope you enjoyed the ride.
Tagged: blog, jekyll, static site generator, minima, jekyll generators